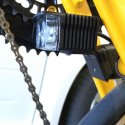
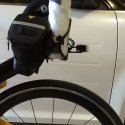
Shine on you crazy diamond

ratz

Wielder of the Rubber Mallet
Well this weekend was suppose to be a 100 miler on the trainer. But thanks to a failure on our main Storage Area Network (SAN); I got to tend to status bars all weekend. So what's a bike guy to do while waiting on RAID rebuilds and consistency checks... Why, open up the garage, bike shop, of course.

My big remaining project was to get the "don't hit me I have to pay for 5 kids to go to college" light on to the Vendetta.

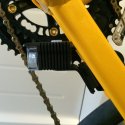
I had to do some modification to the brackets that came with my Design Shine lights but the final result is pretty good. First i had to bend the front bracket to a 45. This was after trying about 20 combinations and confirming with Stephen that it was ok to bend it.
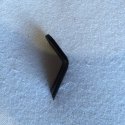
DesignShineFront1.jpg
Then I mounted the light in my preferred location.
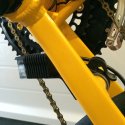
DesignShineFront3.jpgDesignShineFront2.jpg

Below the bottom bracket. This keeps the majority of the light out in front and not bouncing back in my face.
DesignShineFront4.jpg

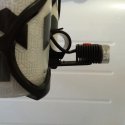
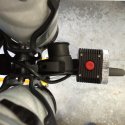
Next up I had to find a good way to mount it behind my custom waterbottle setup.

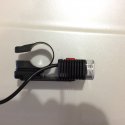
To do that I had to modify the rear braket by reversing the quick release connector.
DesignShineRear1.jpg

Then I used a Dinoette ($9) rear light bracket that I use to use for my Silvio from light. I attached that to the water bottle mounting arms using Qty 3 Garmin mounting rubber bands.
DesignShineRear3.jpg DesignShineRear4.jpg DesignShineRear2.jpg

And There we have it; see me coming day or night (assuming you are not looking at your cell phone)
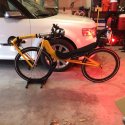
DesignShineLitup.jpg

And finally a video of the lights in action in the garage

https://www.dropbox.com/s/u7nlbi4apoihi6s/DesignShine1.mp4?dl=0

And one of it on the street. (I know, no helmet, it was about to rain and I rushed. Anyone that complains in writing will be compelled to immediately purchase these lights).... Lief you can simply lament the destruction of your budget.

https://www.dropbox.com/s/fmo0gg4jte4c1hj/DesignShine2.mp4?dl=0
 
Last edited:

Rick Youngblood

CarbonCraft Master
Nice front light Bob. Is it made by the same guy that does the rear light? Will that also be using for daytime riding? Seems very bright and looks good too.

PS - first video was full of "video noise". What's a SAN I? RIAD I familiar with, good for killing ants:D!
 

ratz

Wielder of the Rubber Mallet
Yes both front and back are from Design Shine. These will be on in flashing mode during the day rides; and will get used for night time events; and night time training. Two sets of batteries small ones for 2-4 hour training; and big ones for 8-10 hours. If I take all four I'm good for about 14 hours. Rides that longer that the will likely employ a chase car which can charge the opposite battery.

If you look at this tables with a 5600 front battery and a 4400 rear. With flash mode 5 rear front and rear I pretty much don't run out of day time light power.


11053229_10205081528331443_7937403477809579704_n.jpg 10418345_10205081508050936_7167733452043613134_n.jpg
 

Eric Winn

Zen MBB Master

super slim

Zen MBB Master
I too am the proud father of a pair of Designshine lights in the Island Down Under!
My new yellow baby now allows me to safely cruise down an unlit bike-way at 60 kph (38 mph), instead of 40 kph (25 mph) with a Magicshine 808!!! AND it is still visible from 60 degrees to 90 degrees in Daylight and I think 150 degrees at night.
I am limited to 10 photos so I will reply 2 more times

Designshine DS1300 with a spot and a 45 degree lense
__Designshine 2015 Front DS1300 with day yellow filter.JPG

__Designshine 2015 Front Side.JPG
Designshine DS 500 with a spot and a 45 degree lense
__Designshine 2015 Tail DS 500 Side.JPG

__Designshine 2015 Tail DS500.JPG

__Designshine DS 1300 on a Terracycle mount.jpg
Designshine 1300 at night
__Designshine front at night.JPG
Magicshine with 45 deg yellow filter
__Magicshine 808.jpg
Magicshine with 45 deg yellow filter
__Magicshine with 45 deg lense.JPG

I too am the proud father of a pair of Designshine lights in the Island Down Under!
My new yellow baby now allows me to safely cruise down an unlit bike-way at 60 kph (38 mph), instead of 40 kph (25 mph) with a Magicshine 808!!! AND it is still visible from 60 degrees to 90 degrees in Daylight and I think 150 degrees at night.
I am limited to 10 photos so I will reply 2 more times
 
Last edited:

super slim

Zen MBB Master
Night rear 0 degrees.JPG Night rear 30 degrees.JPG Night Rear 45 degrees.JPG Night Rear 60 degrees.JPG Night Rear 75 degrees.JPG Rear 0 degrees TOP 2015 Designshine MIDDLE  2013 Dinotte Daylight  BOTTOM 2011 Daylight.JPG Rear 15 degrees.JPG Rear 45 degrees.JPG Rear 75 degrees.JPG rear 90 degrees.JPG

And now the rear lights during the day and night, with the Designshine DS500 on top, then the 2013 Dinotte Daylight tail light with a spot and 45 degree lenses copying the Designshine, but they removed the clear side covers that reduced the sideways visible angle to 45 degrees, where the 2011 is just visible at 75 degrees and the Designshine 90 degrees. During the day none of the lights really stand out above 45 degrees.

At night all three rear lights are very visible but the Designshine is definitely brighter at all angles.

The beauty of the Designshine is that in the flashing mode , the power can be reduced to 10% of the maximum, where the dinotte can only flash at full power, which is OK during the day, but WAY TOO BRIGHT at night!
 
Last edited:

super slim

Zen MBB Master
__side view at Grange - Copy.jpg Night Designshine front + rear.JPG Silvio + designshine at Kingston Park.jpg __Designshine DS 1300 on a Terracycle mount.jpg

These are FANTASTIC new babies, that make me feel safer when travelling on South Australian roads!!!!

I HOPE that with this many photos, I will get SOME Golden Stars from the MASTER!!!
 
Last edited:

Charles.Plager

Recumbent Quant
row+of+stars.jpg
For the pictures
goldstars.jpg
For being proactive in your safety

(Bob and SS, I'll let you guys decide how these get shared between the two of you :)).
 

ratz

Wielder of the Rubber Mallet
Slim,

Did you intend for the files to all be just attachments? took me a while to figure out that after you upload them; the thumbnail button then inserts a thumb at the cursors current location; and Full inserts the full image also at the cursor. Just curious, which would be a good indication if we should make a quick how-to post.

I like your yellow filter.
 

super slim

Zen MBB Master
I ordered the yellow plastic cover with the light, as the magicshine yellow 45 deg lense was more visible than the clear version.
I think the cost of a yellow cover from Designshine will not be very much, but will be work it during the day, and possibly also during the night.

I just used the upload file button on the bottom right hand side of the screen.
Is there another way?
 

LarryOz

Cruzeum Curator & Sigma Wrangler
Great job Bob!
A lot of work - but nice result.

For me: I think I'll just keep riding indoors in virtual reality - then I don't have to worry about lights, or rain, or cars, or trucks.... :)
 

ratz

Wielder of the Rubber Mallet
I just used the upload file button on the bottom right hand side of the screen.
Is there another way?

After you upload with that button, there is more you can do to make your post fancy. While editing and after upload, you will see your photos as thumb nails below the edit area. You then place your cursor into the text where you want the photo to appear. Then you click "thumbnail" to insert the thumbnail into your text. You click "fullimage" to insert the full size image. Both are clickable for zoom. In my first post of the thread you can see the first three pictures are thumbnails, and the fourth is a full image.

Nothing wrong with leaving them as only attachment, but placing in the body makes them easier to read the thread on tablets and phones.
 

ratz

Wielder of the Rubber Mallet
I ordered the yellow plastic cover with the light, as the magicshine yellow 45 deg lense was more visible than the clear version.
I think the cost of a yellow cover from Designshine will not be very much, but will be work it during the day, and possibly also during the night.

I just found my filter in the box. I thought it was some sort of spacer. That's definitely getting installed; to increase the "what the heck is that" factor.
 

ratz

Wielder of the Rubber Mallet
Great job Bob!
A lot of work - but nice result.

For me: I think I'll just keep riding indoors in virtual reality - then I don't have to worry about lights, or rain, or cars, or trucks.... :)

With the power you put out; you only have to work about cars coming from the sides. The ones behind you are not catching up.
 

super slim

Zen MBB Master
Bob I used ALL 5 batteries that I have to run these lights for the comparison.
I now just use the two Designshine babies!!!
 

Rick Youngblood

CarbonCraft Master
Just curious, which would be a good indication if we should make a quick how-to post.

I think it would be a good idea Bob, we seem to be stumbling upon these great feature by accident. Also as an alternative to "Upload a File" button, you can drag your image straight off your desktop, or even from another website into the editor pane and it will upload automatically and then choose 'Thumb" or "Full Size" buttons to display the images along with your content.
 

LarryOz

Cruzeum Curator & Sigma Wrangler
With the power you put out; you only have to work about cars coming from the sides. The ones behind you are not catching up.

Thanks Bob!
I do keep working on my power, and I think it is easier indoors on the KICKR than outdoors due to the constant load you can put on your body.
I think I'm up 20% from last fall. Just about halfway towards my goal FTP.

Yeah, it's actually the crazies that run stop-lights and stop signs that really bug/worry me.
It is getting to where you can't even fly through an intercession safely anymore.
 

LarryOz

Cruzeum Curator & Sigma Wrangler
btw - I really love the way the "quote" thing works on this forum!
Just select what you want to quote and click reply - Very sweet!
 
Top