John Tolhurst
Zen MBB Master
I received a shipping notice for my Vendetta with tracking number from Cruzbike on Apr 12, 2013. The framekit box arrived at my house on April 16, 2013. Fast - and the US Postal Service delivered it which surprised me. I was expecting it would show up with UPS or FedEx.
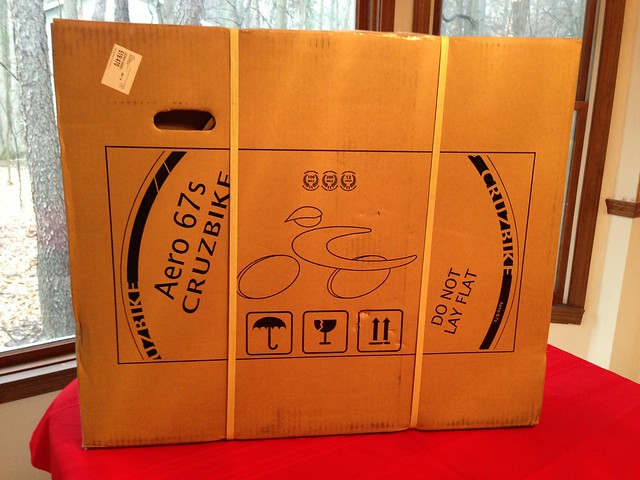
First, it is a surprisingly itty bitty box (approx 43"x15"x6"). I've included a Quest, my KICKR, and Koda for a frame of reference.
alt="IMG_1667"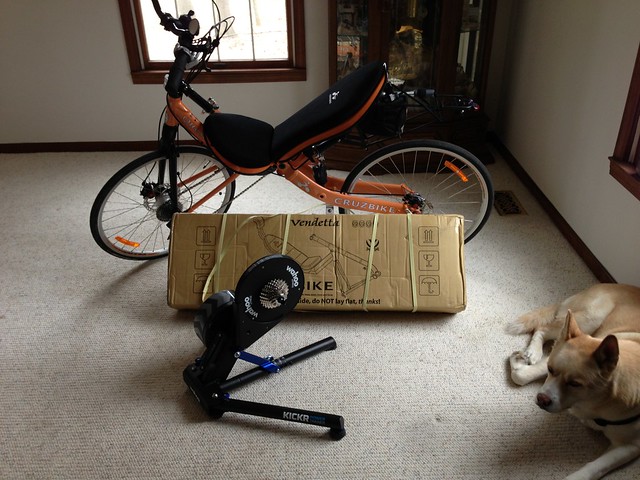
The carton was shipped directly from Taiwan:

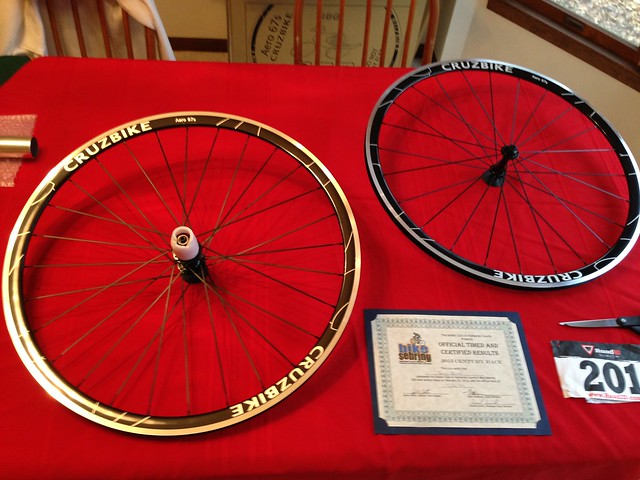
Note the handlebars arrive in a separate package, usually along with anything else you ordered directly through cruzbike.com. I am expecting that package today. My order included a SRAM Rival groupset (including rim brakes) that I customized with a lot of help from Jim Parker - Thanks Jim! Let's hope we did it right, I am using a SRAM mountain back RD and an 11x36 cassette. I also ordered the Aero 67s (rim brake) wheels offered by Cruzbike and a few other odds and ends.
I originally ordered my Vendetta on Sep 14, 2012 just as they ran out of framestock. Although it has been a long wait due to the transition to John Tolhurst's brilliant new hydroformed main frame tube I am very, very pleased despite the wait because I am amazed, bemused, and delighted at this next generation of the Vendetta.
After I found out this next generation would include disc brake tabs I began researching disc brakes along with a hub dynamo as I am interested in ultracycling and perhaps randonnuering which can require a lot of night and all weather riding. More to follow on this in a separate build post but I am thinking Avid BB7 Road SL with 160mm rotor front and 140mm rotor rear along with an SP PD-7 switchable dyno hub on a Velocity 700c reflective road disc wheelset. I'm signed up for the 2013 National 24 Hour Challenge on June 15,16 and I want to also try racing in the 29th Annual Michigan Human Powered Vehicle Association Rally on May 18,19 so for now I'll just use the SRAM Rival set with the Aero 67s unless I can corrall the disc wheelset changes together quickly.
Now, back to the unboxing.
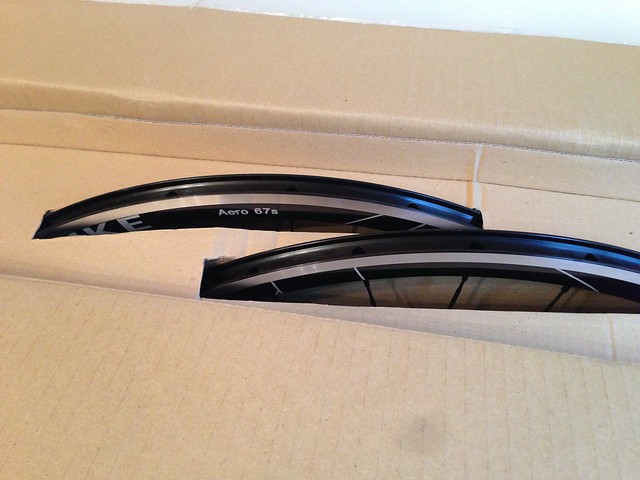
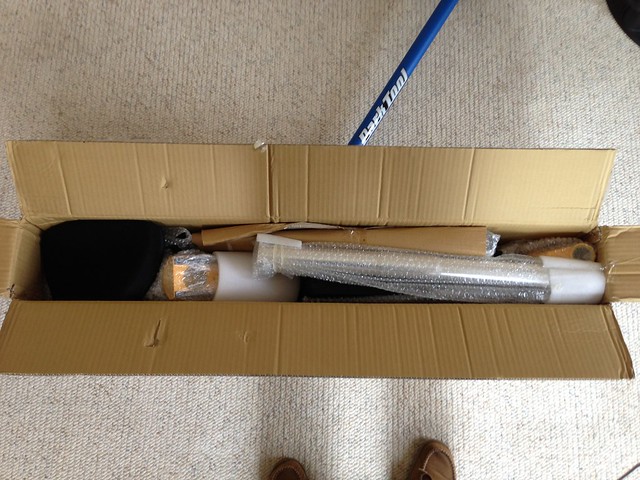
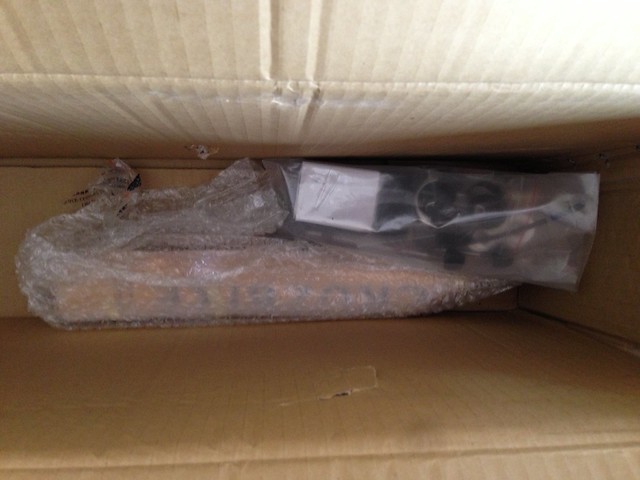
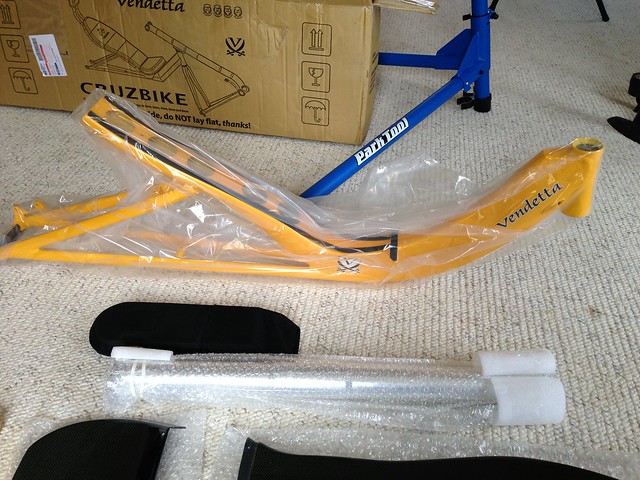
Opening shows tightly but well padded contents:
Here is what came out first:

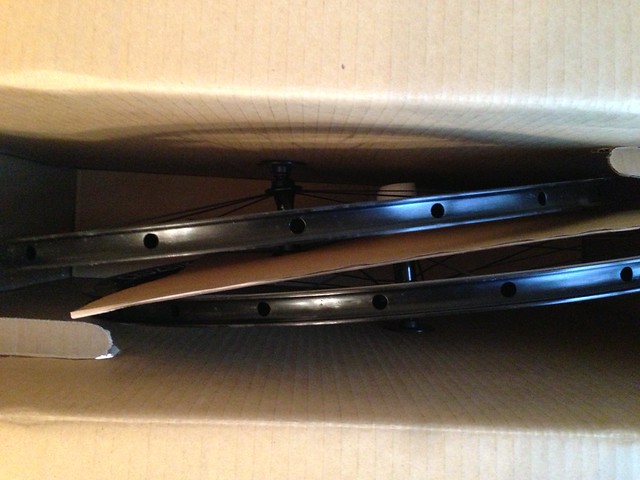
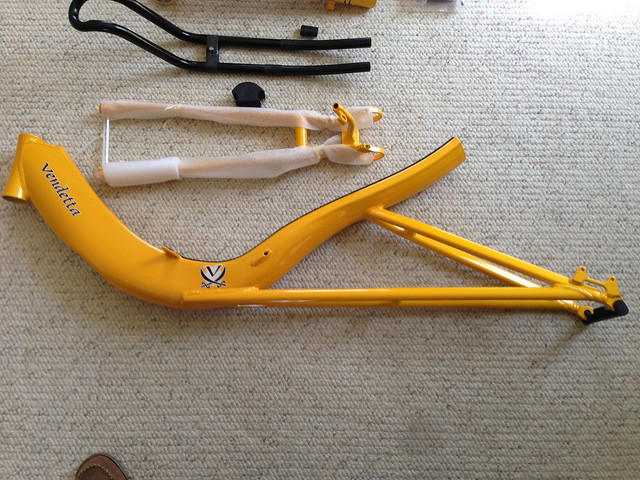
Finally exposing the frame everyone has been wildly anticipating:
Which came out with chainstay and headrest cleverly and carefully interwoven with the new HF frame:
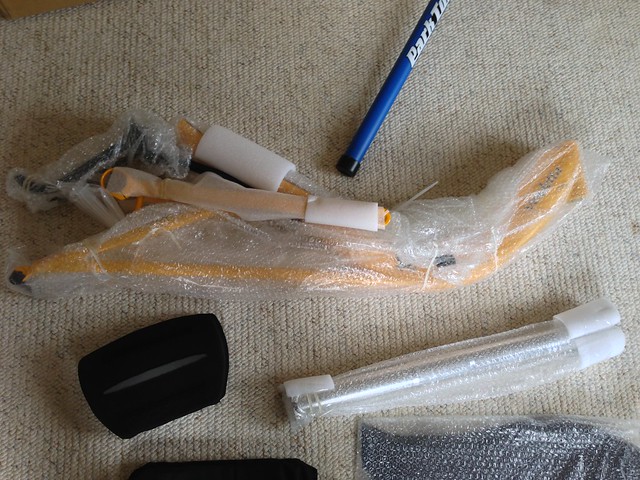
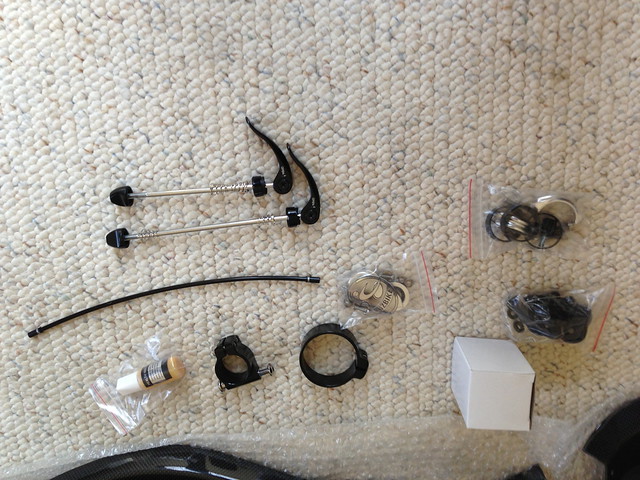
Leaving just the boom and other bits like the skewers, headset bearings, paint touch up bottle, etc:
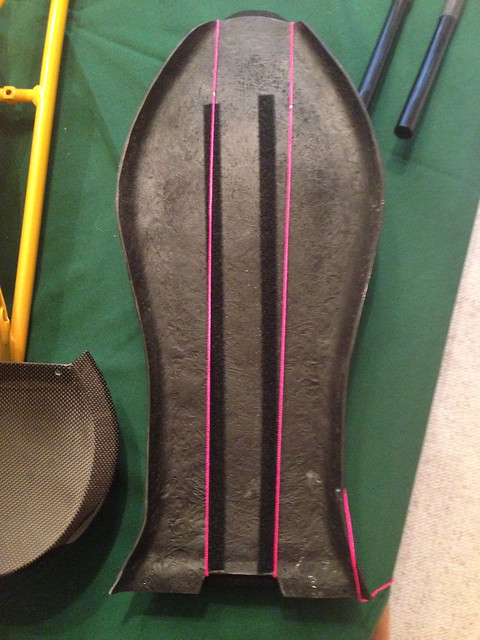
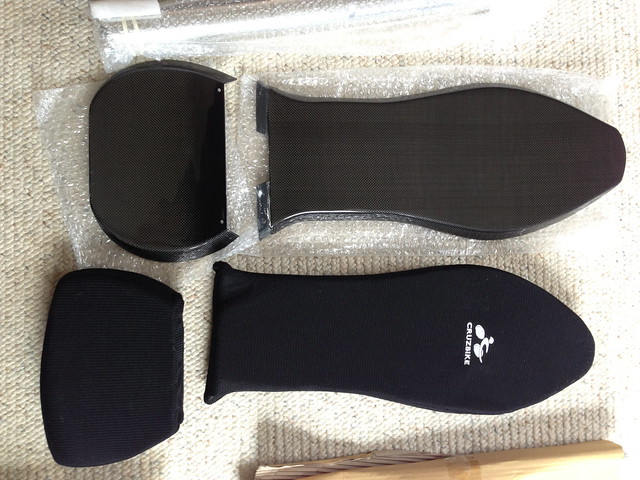
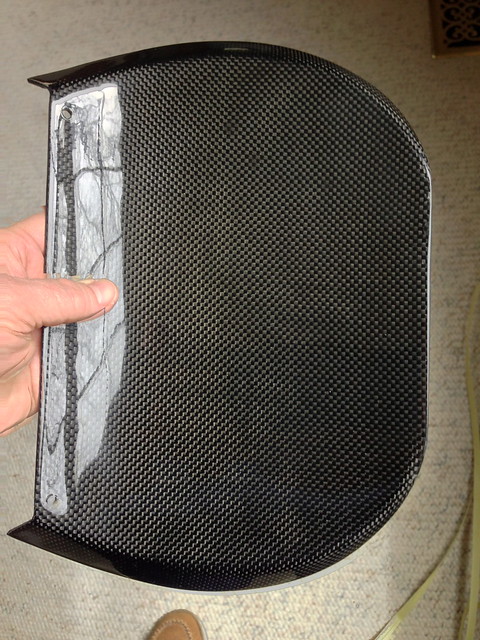
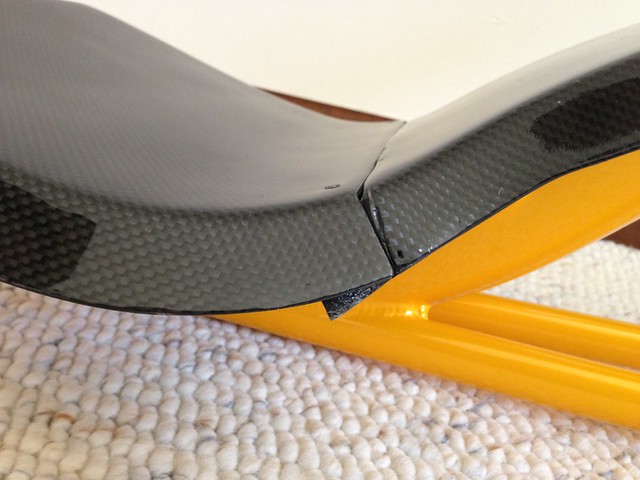
Here is the new fiberglass seat and cushions. Based on a discussion with Jim Parker, this is a fiberglass prototype with a carbon fiber top skin for good looks with an actual carbon fiber seat to follow that John is still working on. Jim and.or John may have further clarification or corrections for this.
It is defintely shiny and pretty on this side:
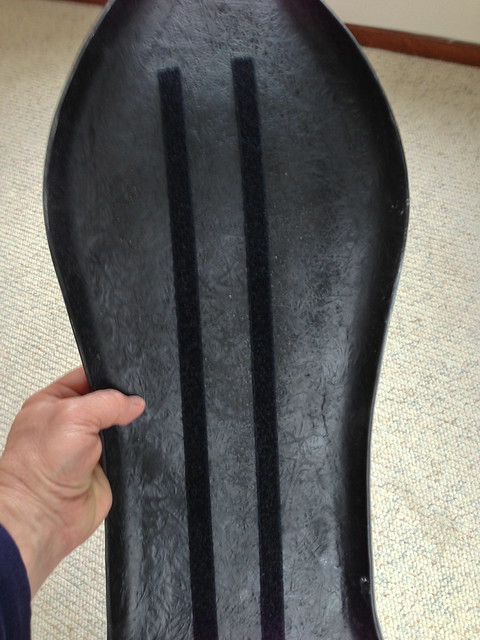
But not so good here. Serviceable, but the Vendetta will be better suited with the actual CF seat still in-work:
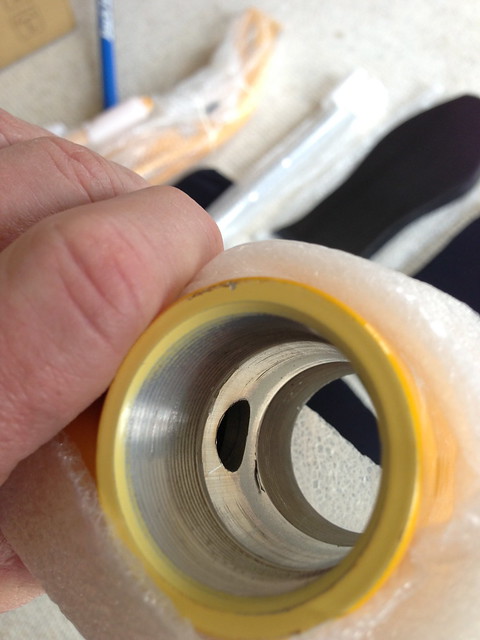
As you unwrap your goodies, you will want to inspect each part closely. I noticed a small machining burr inside the BB housing on the boom. It brushed off with just a tiny flick of the finger so nothing of importance. As fthills also noted on his Vendetta 2.0 unboxing, you will want to check threads carefully for paint, etc.
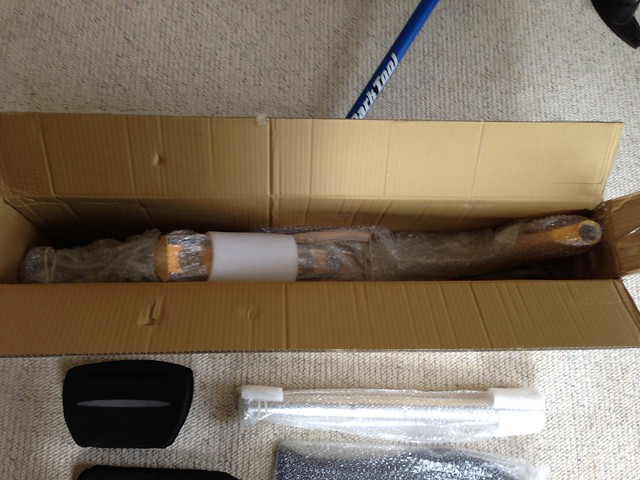
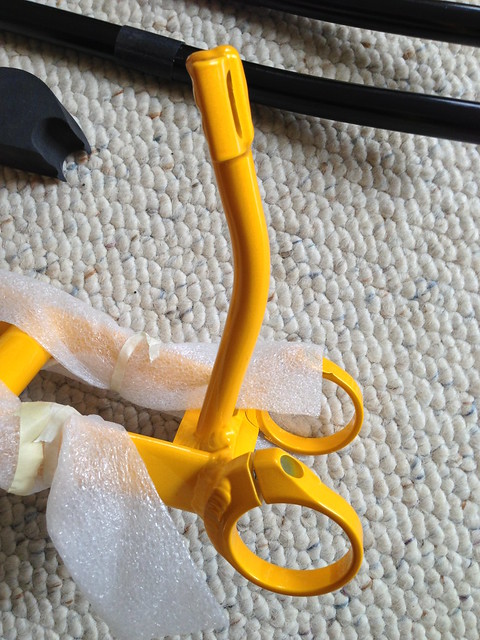
Here is the boom and the headrest. Note the new filler foam for the end of the frame since the headrest now fits inside the frame instead of being bolted to the seat:
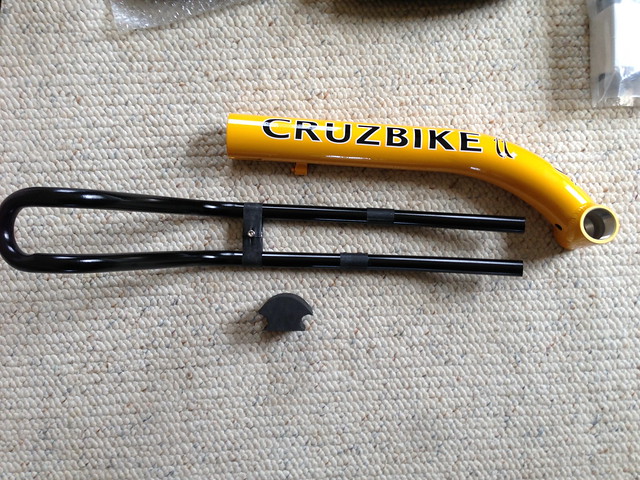
In this photo, you can see the clever way John arranged to pack his clever scissor-jack style internal-to-frame headrest clamp. You can just see the foam insert for the end of the frame which plugs the hole where the headrest tubes stick out from the end of the open frametube.

Another view of the foam plug:
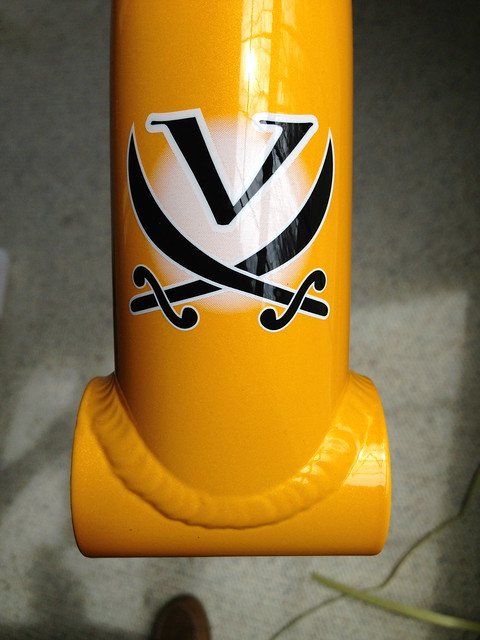
Here is one of the first things folks will see as you cross the finish line! Isn't it beautiful?
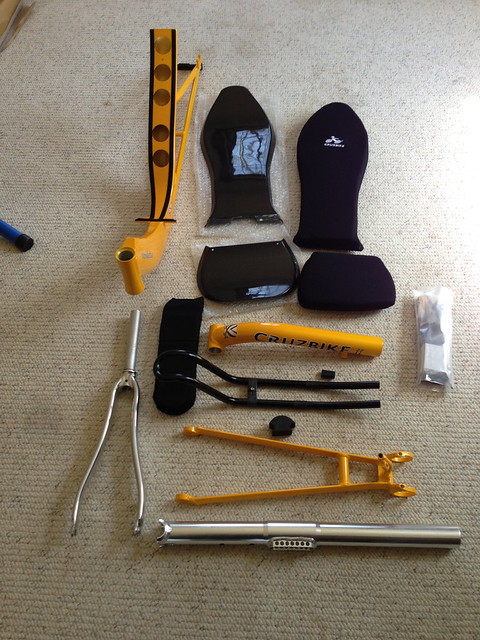
BB ring clamps, FD stalk, and chainstay assembly. I don't think John made any changes here but he can confirm:
Unpacking the new centerpiece - woohoo!
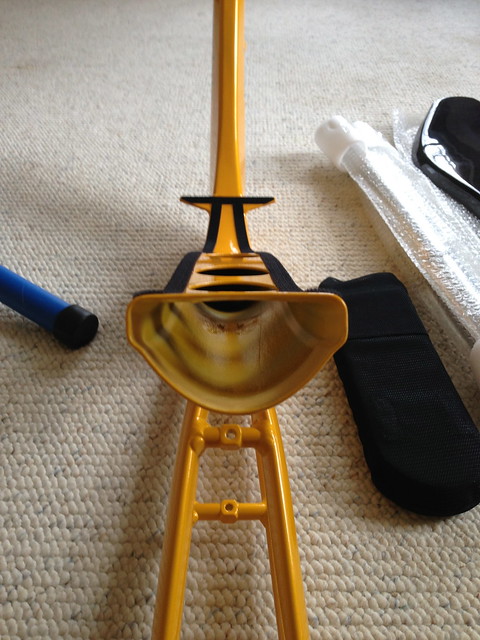
The hydroforming surprised me. There are are lot more details and nuances to John's design than I expected. There is a lot of really cool geometry in this thing. Note the end is not just a rounded triangle but has more defined fluted corners, if you will, for where the headrest tubes rest. Very slick.
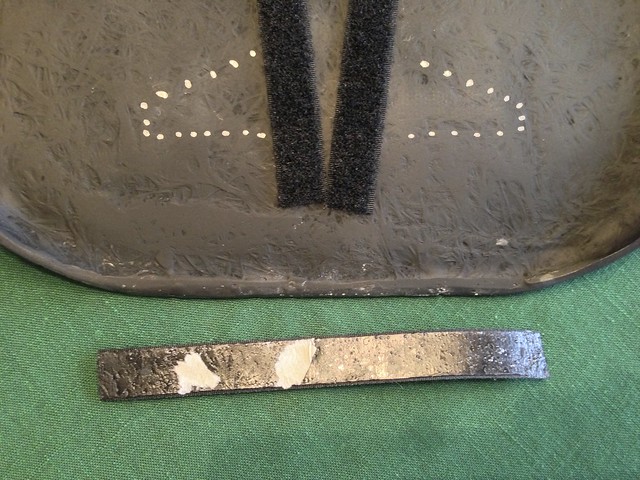
Note the velcro strips that hold the seat onto the frame were apparently applied with a bit too much tension as you can see the adhesive has come a little unstuck. Just press it back down and it will be fine. Once you ride it a bit the pressure of your weight and the seat pan will probably result in the adhesive sticking and staying in place without pulling up like this again.
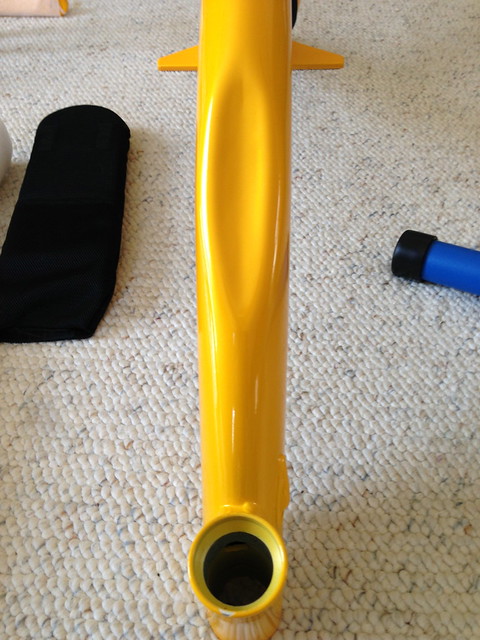
Here is the new head angle and internal cable routing:
Another angle. The little horns you see at the bottom of the curve are seat stays or braces

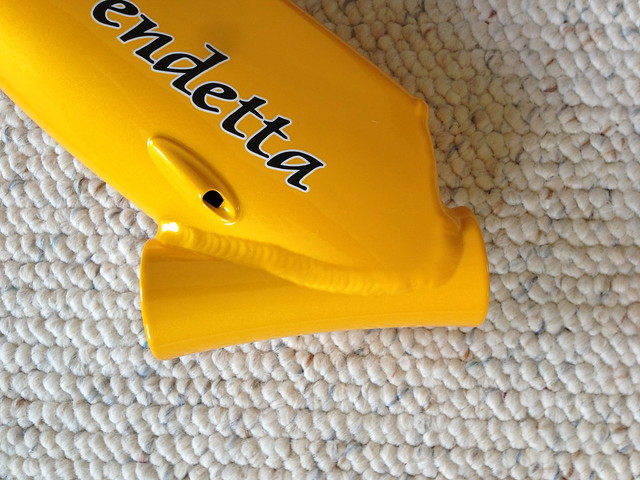
Damn! Dented in transit - kidding. This is the new tire dimple. Cute, yes?
Here is the side view. That is just so cool...
Closer view:

Despite the tight packing everything was well padded but I did get one small shipping blemish on the rear disc brake tab. No worries however as John includes a bottle of touch up paint with each frameset.

I did advise John and Jim that they need to add something to better pad the little seat stay horns as one side punctured through my box during transit. Fortunately, no chipped paint but just a very light scuff - but it is not really noticeable.

General overview:
New seat needs a bit of fitting TLC. I expect John's carbon fiber replacement will clean up these minor issues.
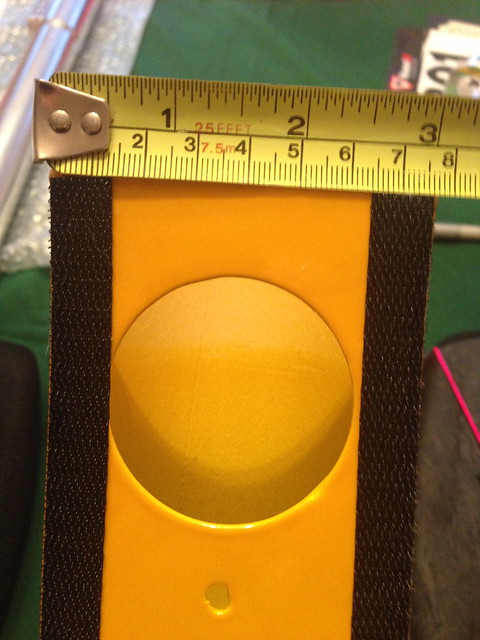
The velcro strip for the bottom seat pan was not put in the correct location. It needs to be moved back so it lines up with the corresponding velcro strip on the seat stay horns:
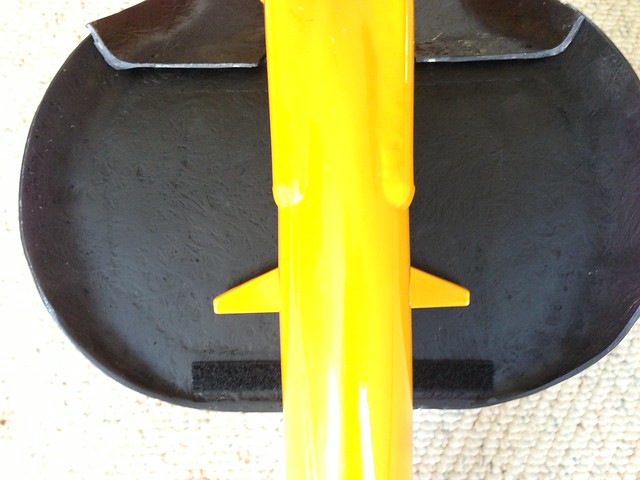
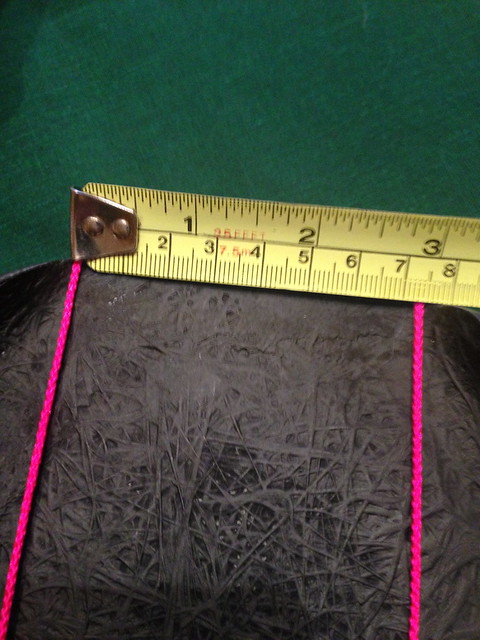
The leading edge of the bottom seat pan will need some sort of padding or another bit of velcro strips or other solution to prevent this edge from rubbing through the pain on the frame at this point:

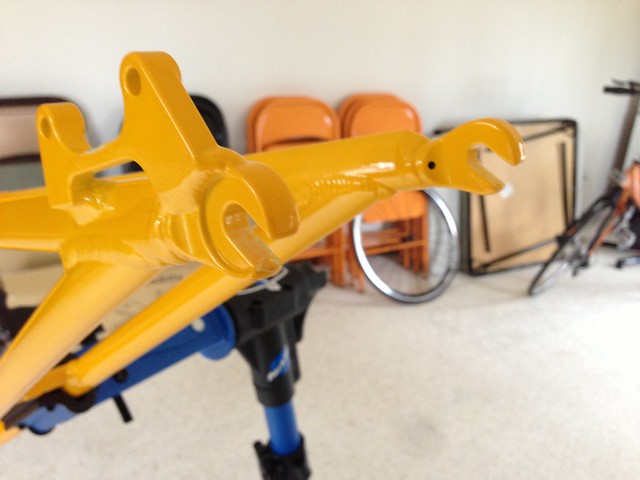
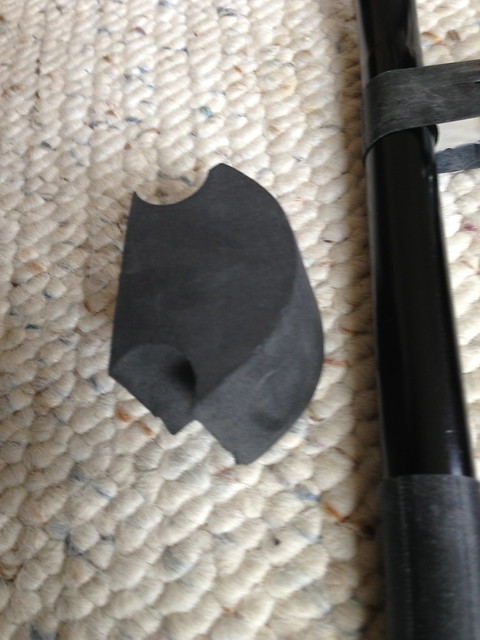
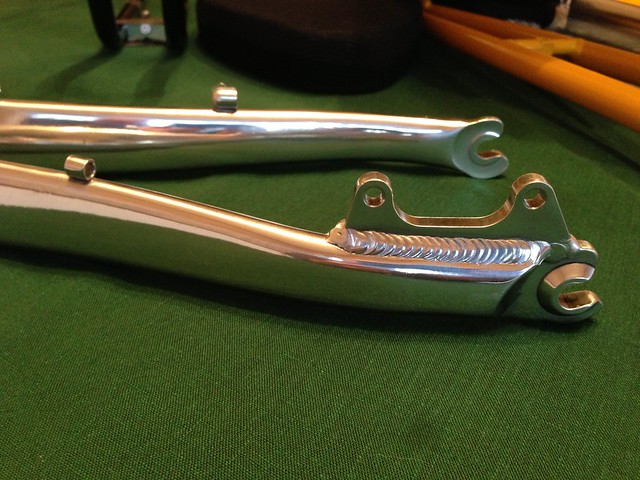
Here is the new fork disc brake tab:
That is all I have for the unboxing. I'll be creating a separate build thread later.
John Tohurst, as has been said before, "I dips me lid to you". Truly a marvelous and delightful design.
-Eric
First, it is a surprisingly itty bitty box (approx 43"x15"x6"). I've included a Quest, my KICKR, and Koda for a frame of reference.
alt="IMG_1667"
The carton was shipped directly from Taiwan:
Note the handlebars arrive in a separate package, usually along with anything else you ordered directly through cruzbike.com. I am expecting that package today. My order included a SRAM Rival groupset (including rim brakes) that I customized with a lot of help from Jim Parker - Thanks Jim! Let's hope we did it right, I am using a SRAM mountain back RD and an 11x36 cassette. I also ordered the Aero 67s (rim brake) wheels offered by Cruzbike and a few other odds and ends.
I originally ordered my Vendetta on Sep 14, 2012 just as they ran out of framestock. Although it has been a long wait due to the transition to John Tolhurst's brilliant new hydroformed main frame tube I am very, very pleased despite the wait because I am amazed, bemused, and delighted at this next generation of the Vendetta.
After I found out this next generation would include disc brake tabs I began researching disc brakes along with a hub dynamo as I am interested in ultracycling and perhaps randonnuering which can require a lot of night and all weather riding. More to follow on this in a separate build post but I am thinking Avid BB7 Road SL with 160mm rotor front and 140mm rotor rear along with an SP PD-7 switchable dyno hub on a Velocity 700c reflective road disc wheelset. I'm signed up for the 2013 National 24 Hour Challenge on June 15,16 and I want to also try racing in the 29th Annual Michigan Human Powered Vehicle Association Rally on May 18,19 so for now I'll just use the SRAM Rival set with the Aero 67s unless I can corrall the disc wheelset changes together quickly.
Now, back to the unboxing.
Opening shows tightly but well padded contents:
Here is what came out first:
Finally exposing the frame everyone has been wildly anticipating:
Which came out with chainstay and headrest cleverly and carefully interwoven with the new HF frame:
Leaving just the boom and other bits like the skewers, headset bearings, paint touch up bottle, etc:
Here is the new fiberglass seat and cushions. Based on a discussion with Jim Parker, this is a fiberglass prototype with a carbon fiber top skin for good looks with an actual carbon fiber seat to follow that John is still working on. Jim and.or John may have further clarification or corrections for this.
It is defintely shiny and pretty on this side:
But not so good here. Serviceable, but the Vendetta will be better suited with the actual CF seat still in-work:
As you unwrap your goodies, you will want to inspect each part closely. I noticed a small machining burr inside the BB housing on the boom. It brushed off with just a tiny flick of the finger so nothing of importance. As fthills also noted on his Vendetta 2.0 unboxing, you will want to check threads carefully for paint, etc.
Here is the boom and the headrest. Note the new filler foam for the end of the frame since the headrest now fits inside the frame instead of being bolted to the seat:
In this photo, you can see the clever way John arranged to pack his clever scissor-jack style internal-to-frame headrest clamp. You can just see the foam insert for the end of the frame which plugs the hole where the headrest tubes stick out from the end of the open frametube.
Another view of the foam plug:
Here is one of the first things folks will see as you cross the finish line! Isn't it beautiful?
BB ring clamps, FD stalk, and chainstay assembly. I don't think John made any changes here but he can confirm:
Unpacking the new centerpiece - woohoo!
The hydroforming surprised me. There are are lot more details and nuances to John's design than I expected. There is a lot of really cool geometry in this thing. Note the end is not just a rounded triangle but has more defined fluted corners, if you will, for where the headrest tubes rest. Very slick.
Note the velcro strips that hold the seat onto the frame were apparently applied with a bit too much tension as you can see the adhesive has come a little unstuck. Just press it back down and it will be fine. Once you ride it a bit the pressure of your weight and the seat pan will probably result in the adhesive sticking and staying in place without pulling up like this again.
Here is the new head angle and internal cable routing:
Another angle. The little horns you see at the bottom of the curve are seat stays or braces
Damn! Dented in transit - kidding. This is the new tire dimple. Cute, yes?
Here is the side view. That is just so cool...
Closer view:
Despite the tight packing everything was well padded but I did get one small shipping blemish on the rear disc brake tab. No worries however as John includes a bottle of touch up paint with each frameset.
I did advise John and Jim that they need to add something to better pad the little seat stay horns as one side punctured through my box during transit. Fortunately, no chipped paint but just a very light scuff - but it is not really noticeable.
General overview:
New seat needs a bit of fitting TLC. I expect John's carbon fiber replacement will clean up these minor issues.
The velcro strip for the bottom seat pan was not put in the correct location. It needs to be moved back so it lines up with the corresponding velcro strip on the seat stay horns:
The leading edge of the bottom seat pan will need some sort of padding or another bit of velcro strips or other solution to prevent this edge from rubbing through the pain on the frame at this point:
Here is the new fork disc brake tab:
That is all I have for the unboxing. I'll be creating a separate build thread later.
John Tohurst, as has been said before, "I dips me lid to you". Truly a marvelous and delightful design.
-Eric