ak-tux
Zen MBB Master
This thread is for those who are interested in making their own custom seat if the stock seat doesn't fit well and they don't want to purchase another seat.
I must say, however, that it's not my original idea. I first saw it on BROL (Bentrider Online) by Terry http://www.bentrideronline.com/messageboard/showpost.php?p=992660&postcount=17.
The link to the complete thread is here: http://www.bentrideronline.com/messageboard/showthread.php?t=89319
Similar technique for carbon seat here:
http://carbonbent.bravehost.com/seat.html
DISCLAIMER: This is information provided as is for those who have DIY build skills and some of the examples shown are not official cruzbike models. Cruzbike is not liable for this.
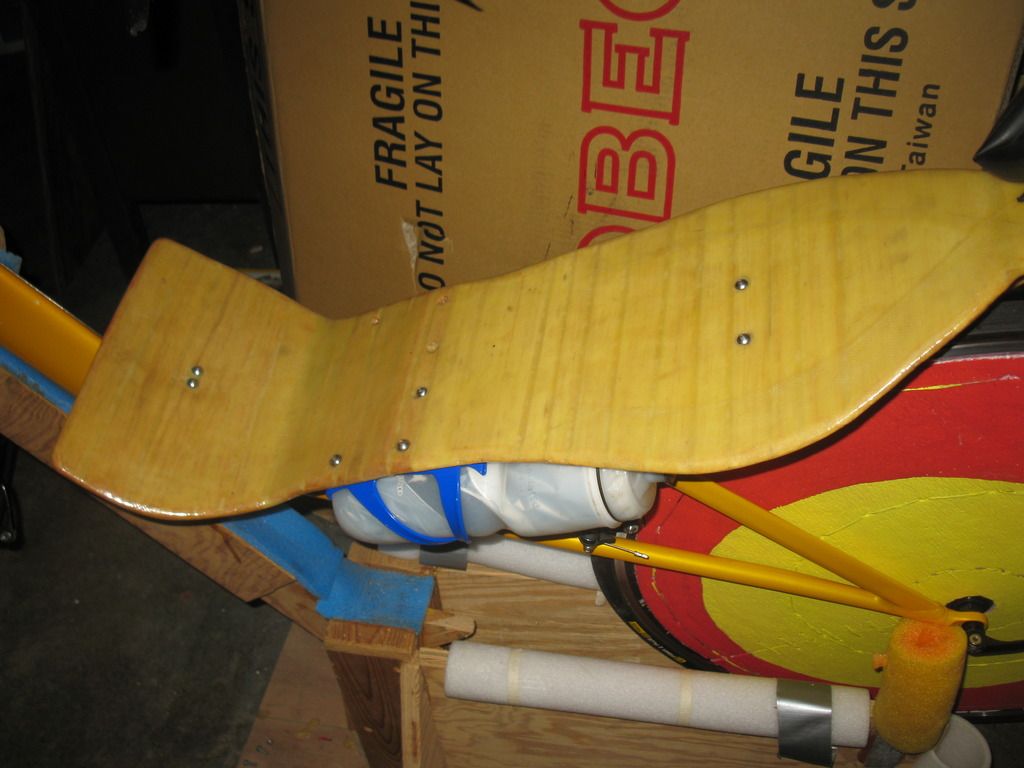
In summary, its a wood/glassfibre composite seat, made as follows:
1. Sketch or draw an appropriate vertical shape/curve of the seat on a hard paper. This will be your template for the cradle/ribs. You can use your existing seat as a starting guide plus your custom modification.
2. draw the shape of the top of the seat on a similar hard paper. This will be your seat top template. Again use your existing seat as a guide then add your custom modifications to the shape as needed.
3. Trace the ribs on a 7-ply or 9-ply plywood and cut them out using a jigsaw.
4. You can use this as a temporary cradle(to be replaced by form-core ribs) or keep it as part of the seat. If you intend to keep them, as I did, then assemble the ribs 10 cm to 12 cm apart (this will leave some space for water bottle mounts later). To assemble the cradle/ribs use some horizontal pieces of plywood and fasten with screws and glue. They do however affect the final weight. Ordinary wood glue will do. You can also use epoxy.

5. Cut srips of 300mm by 50mm (12" x 2" ) of 3-ply plywood for the curved parts of the top. (Optionally, to make them a bit more flexible you can soak them for a night in a bucket of warm water, but this is not really necessary ).
6. Using a staple gun or small tac nails and woodglue or epoxy attach the strips to the craddle. Let it dry/cure for a day. You can remove the staples once the glue sets.

7. Using your seat top template (step 2 above) trace out the shape of the seat top, making sure it is properly and symmetrically centred.
8. Cut out the shape along the trace lines using your jigsaw or coping saw.

9. Using sawdust and wood glue make a thick paste and fill the corners and spaces. Especially the corners should be nicely rounded otherwise the fiberglass will not lay properly. Leave to dry for a day
10. Round off all the sharp corners and sand down to your satisfaction.
11. You can pre-coat a very thin layer of epoxy and let it set for period specified for the type of resin you purchased.
Note: the amount of resin used greatly determines the weight of the seat. Be as frugal as is technically possible.
12. Lay one layer 4oz or 6oz fiberglass cloth on top and may be two or three layers at the back(underside). Optionally, if you know how to vacuum bag them you will get even better results. (I did not vacuum bag mine.)
13. Let cure, sand and (spray)paint to your liking.
14. Optionally make some cutouts using a hole saw and jigsaw to improve ventilation and weight savings.
15. Mount it to your bike, add some padding and test/enjoy your custom seat!
(Ventisit-Like material is good if you can find. It's generically referred to as
Air Circulation Mesh ACS10. Try and google "3D Mesh ACS10" or "AERO-MESH". I have not tested this link but you can try http://www.aero-mesh.com.au/ and https://www.ahh.biz/mesh/ . I got mine from local motorcycle seat accessories shops in Nairobi. It looks just like ventisit but really cheap chinese made about an equivalent of US$3 for a 1m x 0.3m seat cover.)
You may need to repeat the build a couple of times to perfect the skill. You generally learn from your mistakes and get better each time.
If you are precise with your design and frugal with the resin it's possible to build a medium sized seat weighing between about 900 grams to about 1.2Kg. Most importantly you can customise it to fit you more precisely and comfortably:

Examples of wood/composite seats:
Terry's build


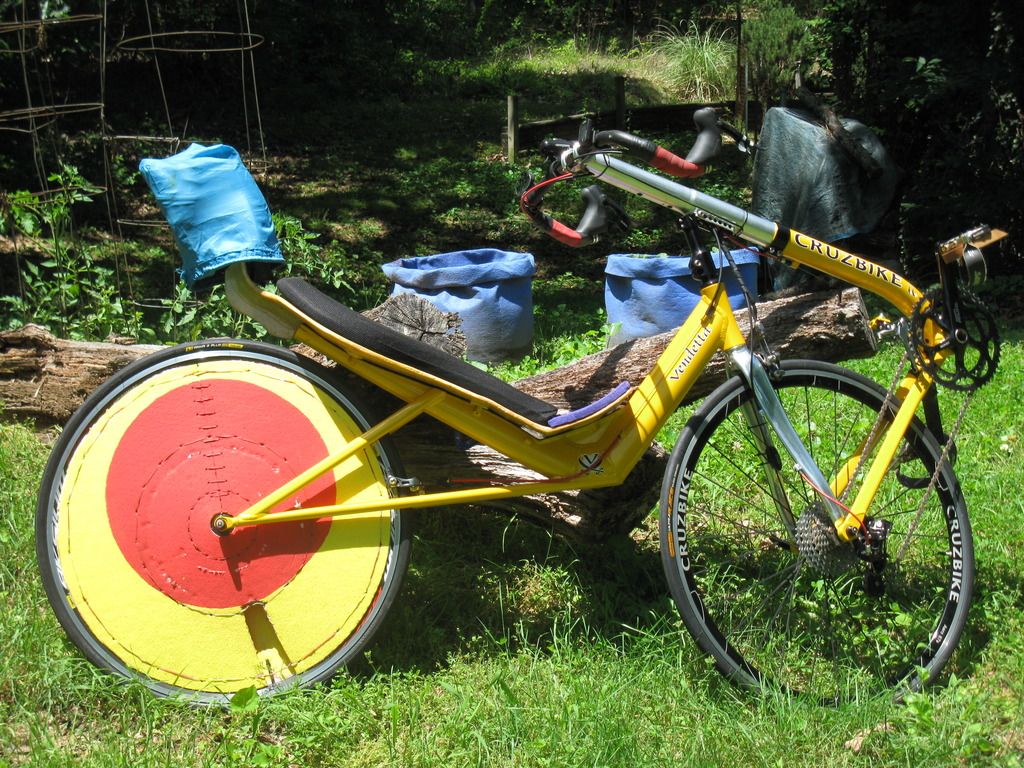
My DIY (Nairobi Edition! ):


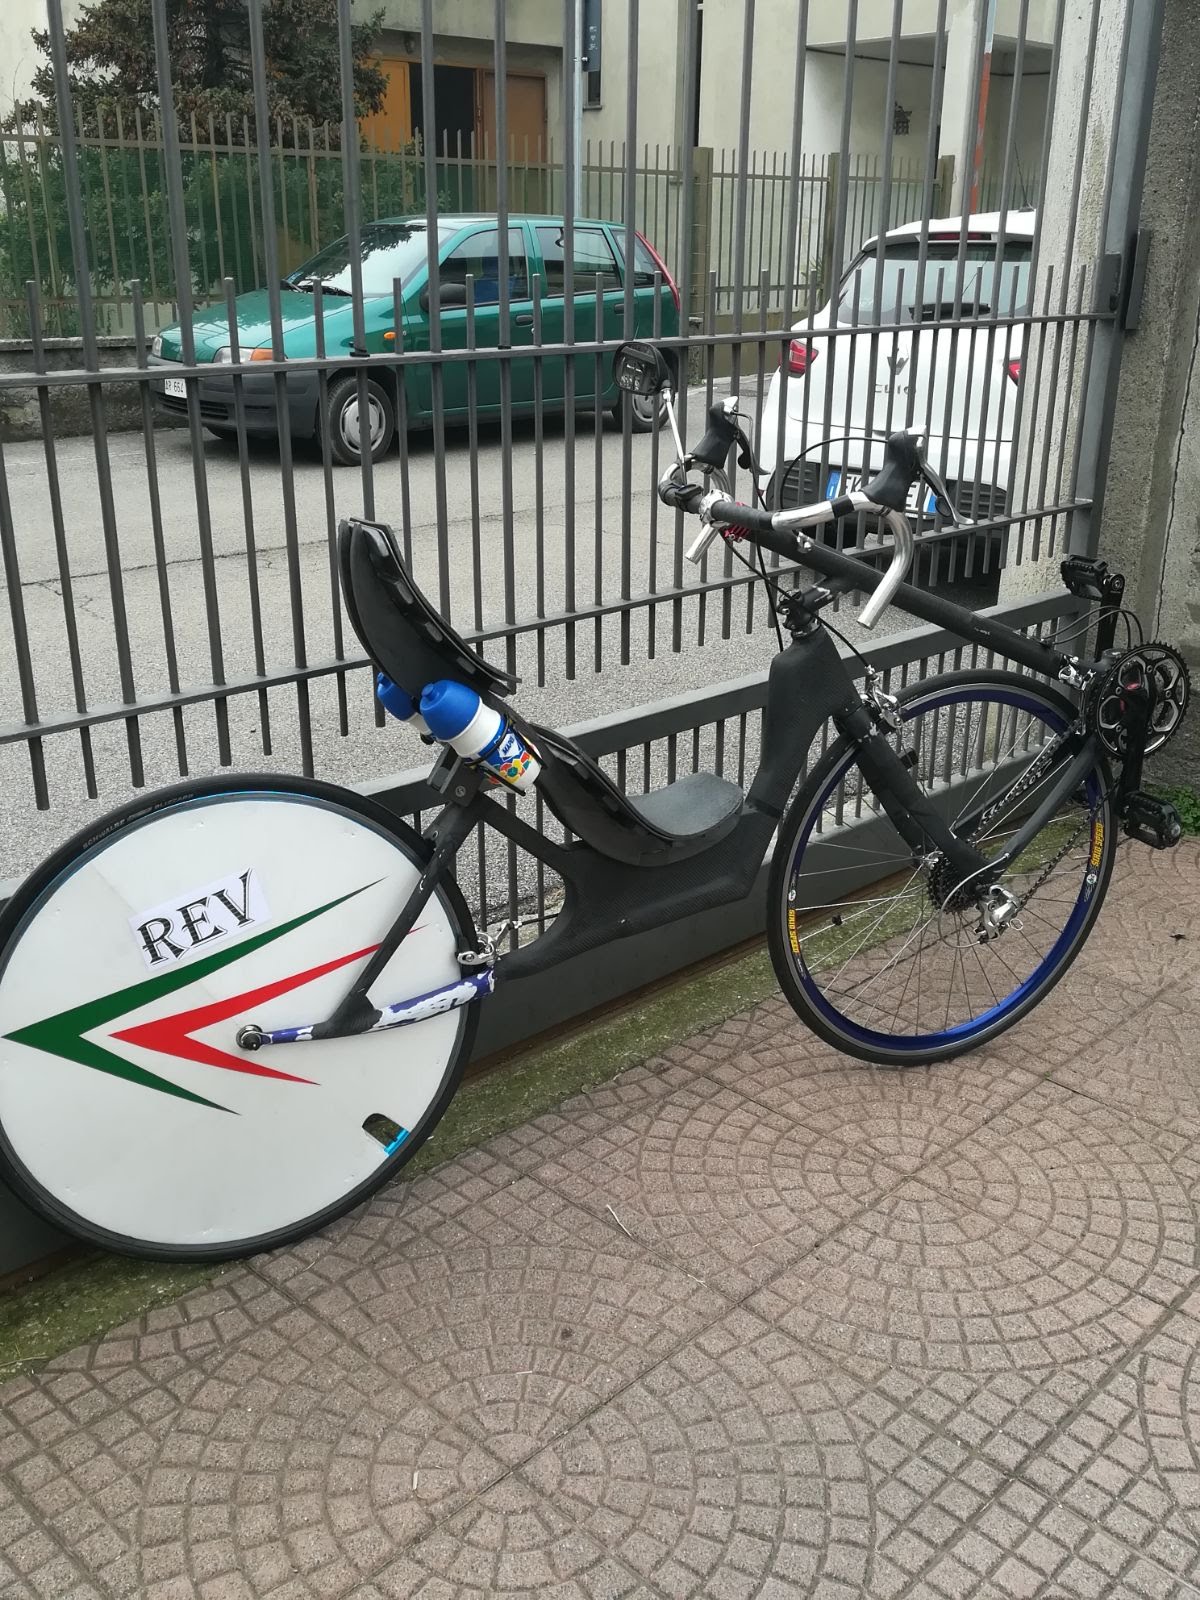
Italian Carmelo : https://biciclettereclinate.blogspot.it/2018/02/rev-replica-by-carmelo.html
French build:

German Hibone Minimalist Wood seat:


I must say, however, that it's not my original idea. I first saw it on BROL (Bentrider Online) by Terry http://www.bentrideronline.com/messageboard/showpost.php?p=992660&postcount=17.
The link to the complete thread is here: http://www.bentrideronline.com/messageboard/showthread.php?t=89319
Similar technique for carbon seat here:
http://carbonbent.bravehost.com/seat.html
DISCLAIMER: This is information provided as is for those who have DIY build skills and some of the examples shown are not official cruzbike models. Cruzbike is not liable for this.
In summary, its a wood/glassfibre composite seat, made as follows:
1. Sketch or draw an appropriate vertical shape/curve of the seat on a hard paper. This will be your template for the cradle/ribs. You can use your existing seat as a starting guide plus your custom modification.
2. draw the shape of the top of the seat on a similar hard paper. This will be your seat top template. Again use your existing seat as a guide then add your custom modifications to the shape as needed.
3. Trace the ribs on a 7-ply or 9-ply plywood and cut them out using a jigsaw.
4. You can use this as a temporary cradle(to be replaced by form-core ribs) or keep it as part of the seat. If you intend to keep them, as I did, then assemble the ribs 10 cm to 12 cm apart (this will leave some space for water bottle mounts later). To assemble the cradle/ribs use some horizontal pieces of plywood and fasten with screws and glue. They do however affect the final weight. Ordinary wood glue will do. You can also use epoxy.
5. Cut srips of 300mm by 50mm (12" x 2" ) of 3-ply plywood for the curved parts of the top. (Optionally, to make them a bit more flexible you can soak them for a night in a bucket of warm water, but this is not really necessary ).
6. Using a staple gun or small tac nails and woodglue or epoxy attach the strips to the craddle. Let it dry/cure for a day. You can remove the staples once the glue sets.
7. Using your seat top template (step 2 above) trace out the shape of the seat top, making sure it is properly and symmetrically centred.
8. Cut out the shape along the trace lines using your jigsaw or coping saw.
9. Using sawdust and wood glue make a thick paste and fill the corners and spaces. Especially the corners should be nicely rounded otherwise the fiberglass will not lay properly. Leave to dry for a day
10. Round off all the sharp corners and sand down to your satisfaction.
11. You can pre-coat a very thin layer of epoxy and let it set for period specified for the type of resin you purchased.
Note: the amount of resin used greatly determines the weight of the seat. Be as frugal as is technically possible.
12. Lay one layer 4oz or 6oz fiberglass cloth on top and may be two or three layers at the back(underside). Optionally, if you know how to vacuum bag them you will get even better results. (I did not vacuum bag mine.)
13. Let cure, sand and (spray)paint to your liking.
14. Optionally make some cutouts using a hole saw and jigsaw to improve ventilation and weight savings.
15. Mount it to your bike, add some padding and test/enjoy your custom seat!
(Ventisit-Like material is good if you can find. It's generically referred to as
Air Circulation Mesh ACS10. Try and google "3D Mesh ACS10" or "AERO-MESH". I have not tested this link but you can try http://www.aero-mesh.com.au/ and https://www.ahh.biz/mesh/ . I got mine from local motorcycle seat accessories shops in Nairobi. It looks just like ventisit but really cheap chinese made about an equivalent of US$3 for a 1m x 0.3m seat cover.)
You may need to repeat the build a couple of times to perfect the skill. You generally learn from your mistakes and get better each time.
If you are precise with your design and frugal with the resin it's possible to build a medium sized seat weighing between about 900 grams to about 1.2Kg. Most importantly you can customise it to fit you more precisely and comfortably:
Examples of wood/composite seats:
Terry's build
My DIY (Nairobi Edition! ):
Italian Carmelo : https://biciclettereclinate.blogspot.it/2018/02/rev-replica-by-carmelo.html
French build:
German Hibone Minimalist Wood seat:
Last edited: